Laravelのタスクスケジューラは、アプリケーションの定期的な処理を自動化するための強力なツールです。
しかし、タスクが実行された際の結果を迅速に把握することも重要です。
本記事では、Laravelの定期実行タスク(スケジュールタスク)の実行結果をSlackに通知する方法について解説します。
Slackを利用することで、タスクの成功や失敗をチーム全体に素早く伝えることができ、問題発生時の対応も迅速に行えます。
この記事を書いた人

エンジニア起業家Yuki
- 2024年1月に起業し、自社サービスと受託開発で年収1億円を目指して奮闘中
- エンジニア歴4年目
- 文系芸術系大学出身→学生時代フリーランスとして2年半活動→23卒で自社開発ベンチャーに入社→起業

ポチップ
Slack Webhook URLの取得
https://api.slack.com/apps ←にアクセスします。
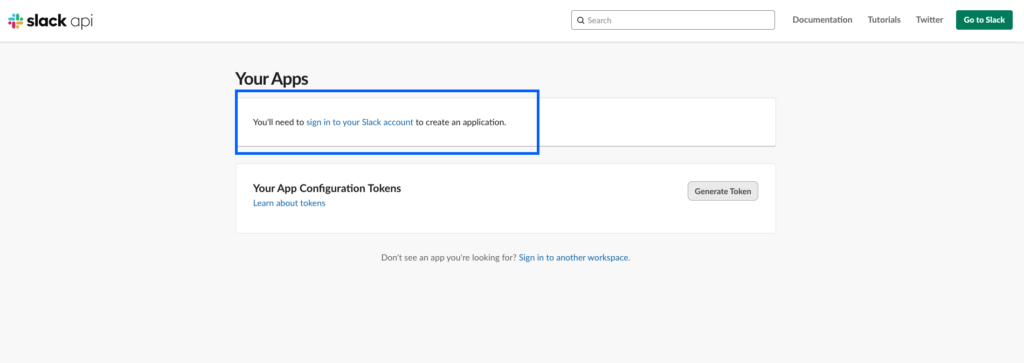
sign in to your Slack accountをクリック。
次の画面で、slackにサインインしましょう。
ログイン後、https://api.slack.com/apps にもう一度行く。

するとCreate an Appというボタンが表示されているのでクリック。
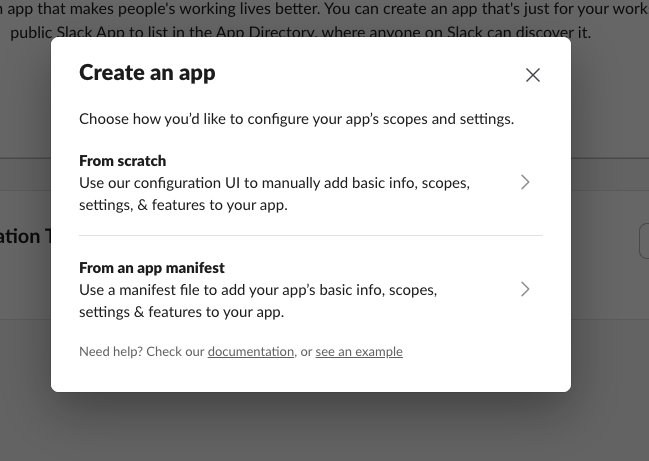
上記のモーダルが表示されるので、From scratch を選択しましょう。
次に、App Name とワークスペースを入力する画面になるので、通知を送りたいワークスペースを選択し、App Name を入力します。
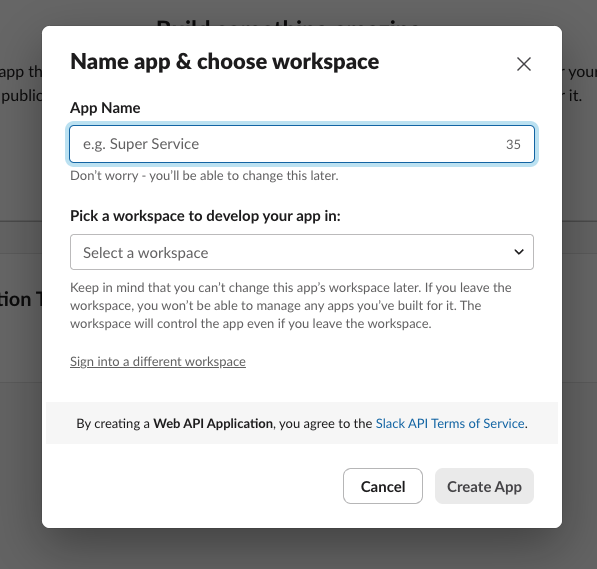
App Name には好きな名前をつけてください。
Create App ボタンをクリックすると、以下のような画面になります。
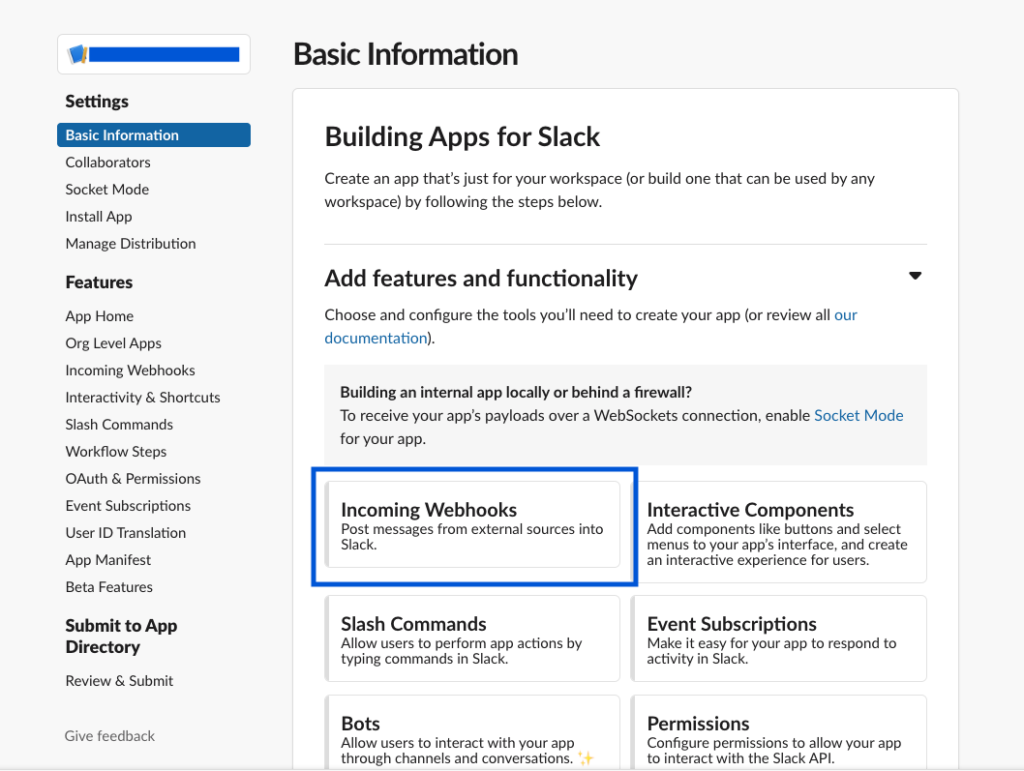
次にIncoming Webhooks を選択します。
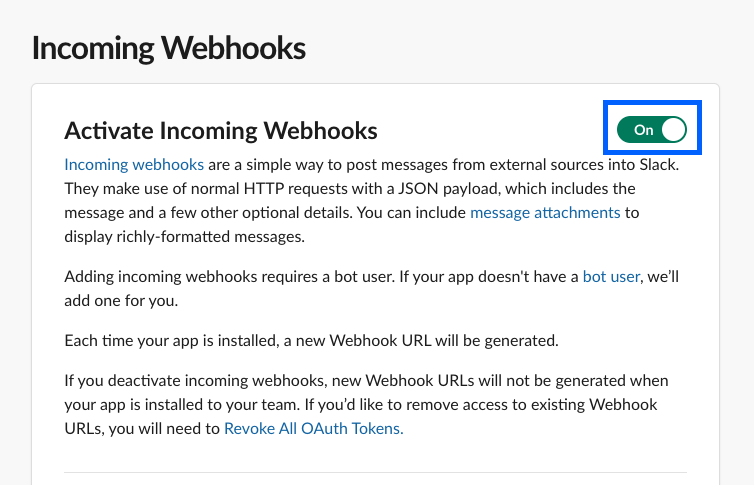
On に変更しましょう。
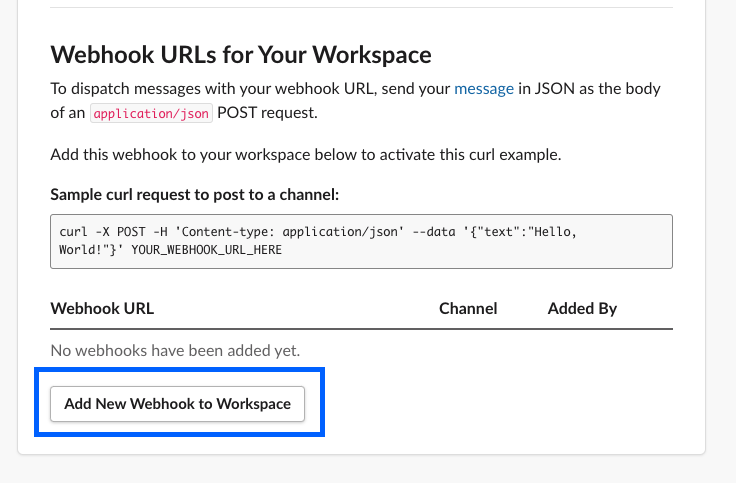
次に、同ページの下部に行き、Add New Webhook to Workspace をクリック。
次に、チャンネルを選択する画面になりますので、通知を送りたいチャンネルを選択し許可する をクリック。
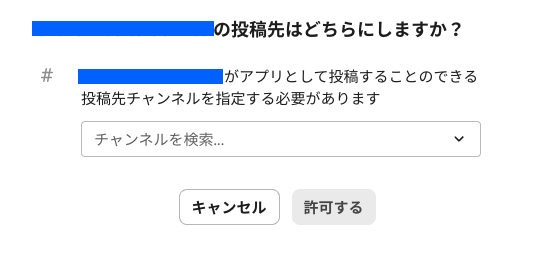
これで設定完了です。

Copyを押してWebhook URLをコピーしておきましょう。
.env に記述しておきましょう。
SLACK_WEBHOOK_URL=https://hooks.slack.com/services/....
SLACK_CHANNEL={チャンネル名を記述}
SLACK_SENDER_NAME={任意の名前を記述}次にconfig/slack.php を作成し、以下を記述します。
<?php

return [
  'webhook_url' => env('SLACK_WEBHOOK_URL'),
  'channel' => env('SLACK_CHANNEL'),
  'sender_name' => env('SLACK_SENDER_NAME'),
];
これで準備OK。
パッケージのインストール(slack-notification-channel)
slack-notification-channelパッケージをインストールします。
composer require laravel/slack-notification-channel Notificationクラスの作成
php artisan make:notification SendSlackNotification実行するとapp/Notificationsの下にSendSlackNotification.phpファイルが作成されました。
<?php

namespace App\Notifications;

use Illuminate\Bus\Queueable;
use Illuminate\Contracts\Queue\ShouldQueue;
use Illuminate\Notifications\Messages\MailMessage;
use Illuminate\Notifications\Notification;
use Illuminate\Notifications\Messages\SlackMessage;

class SendSlackNotification extends Notification
{
    use Queueable;
    protected $message;

    /**
     * Create a new notification instance.
     */
    public function __construct($message)
    {
        $this->message = $message;
    }

    /**
     * Get the notification's delivery channels.
     *
     * @return array<int, string>
     */
    public function via(object $notifiable): array
    {
        return ['slack'];
    }

    public function toSlack($notifiable)
    {
        return (new SlackMessage)
            ->content($this->message);
    }

    /**
     * Get the array representation of the notification.
     *
     * @return array<string, mixed>
     */
    public function toArray(object $notifiable): array
    {
        return [
            //
        ];
    }
}
軽くコード解説
via メソッド
- このメソッドは、通知を送信するチャネルを指定します。
- ここでは
'slack'を指定しており、Slackに通知を送信することを示しています。
toSlack メソッド
- このメソッドは、Slackに送信するメッセージを構成します。
SlackMessageクラスのインスタンスを作成し、メッセージ内容 (content) を設定します。
Slack送信用のNotificationクラスを実際に使ってみる
コマンドの作成
Laravelの Artisan コマンドを使って、新しいコマンドを作成します。以下のコマンドをターミナルで実行します。
php artisan make:command TestCommand
ここでは、テスト用のTestCommand という名前で作成します。
ご自身の環境に合わせて、ファイル名は変えてください。
コマンドファイルを編集する
<?php

namespace App\Console\Commands;

use Illuminate\Console\Command;
use App\Notifications\SendSlackNotification;
use Illuminate\Support\Facades\Notification;

class TestCommand extends Command
{
    /**
     * The name and signature of the console command.
     *
     * @var string
     */
    protected $signature = 'app:test-command';

    /**
     * The console command description.
     *
     * @var string
     */
    protected $description = 'Test sending slack notifications';

    /**
     * Execute the console command.
     */
    public function handle()
    {
        $message = 'This is a test notification.';
        Notification::route('slack', config('slack.webhook_url'))
        ->notify(new SendSlackNotification($message));

        $this->info('Test notification sent to Slack: ' . $message);
    }
}
このコードでは、app:test-command コマンドを実行することで、Slackにテストメッセージを送信するようにしました。
実際はエラーが起きた時や、成功時に実行結果をSlackに送信するなどすると良いと思います。
コマンドの実行
ターミナルで次のコマンドを実行して、Slackにテストメッセージを送信します。
php artisan app:test-command実行後、Slackにテストメッセージが送信されました?

参考URL
https://qiita.com/to3izo/items/c2d16f8b3e52b09e543e
ポチップ